Hello!
I'm here today with a nail tutorial for super-easy sunset nails. I was inspired by one of my friends' manicure that she had done at a salon, but I took the main features of it and gave it an easier twist. Let's get this (beach!) party started.
You'll Need...
~ Yellow nail polish ~
~ Pink nail polish ~
~ Orange nail polish ~
~ Black nail art polish ~
~ Top coat ~
~ Base coat ~
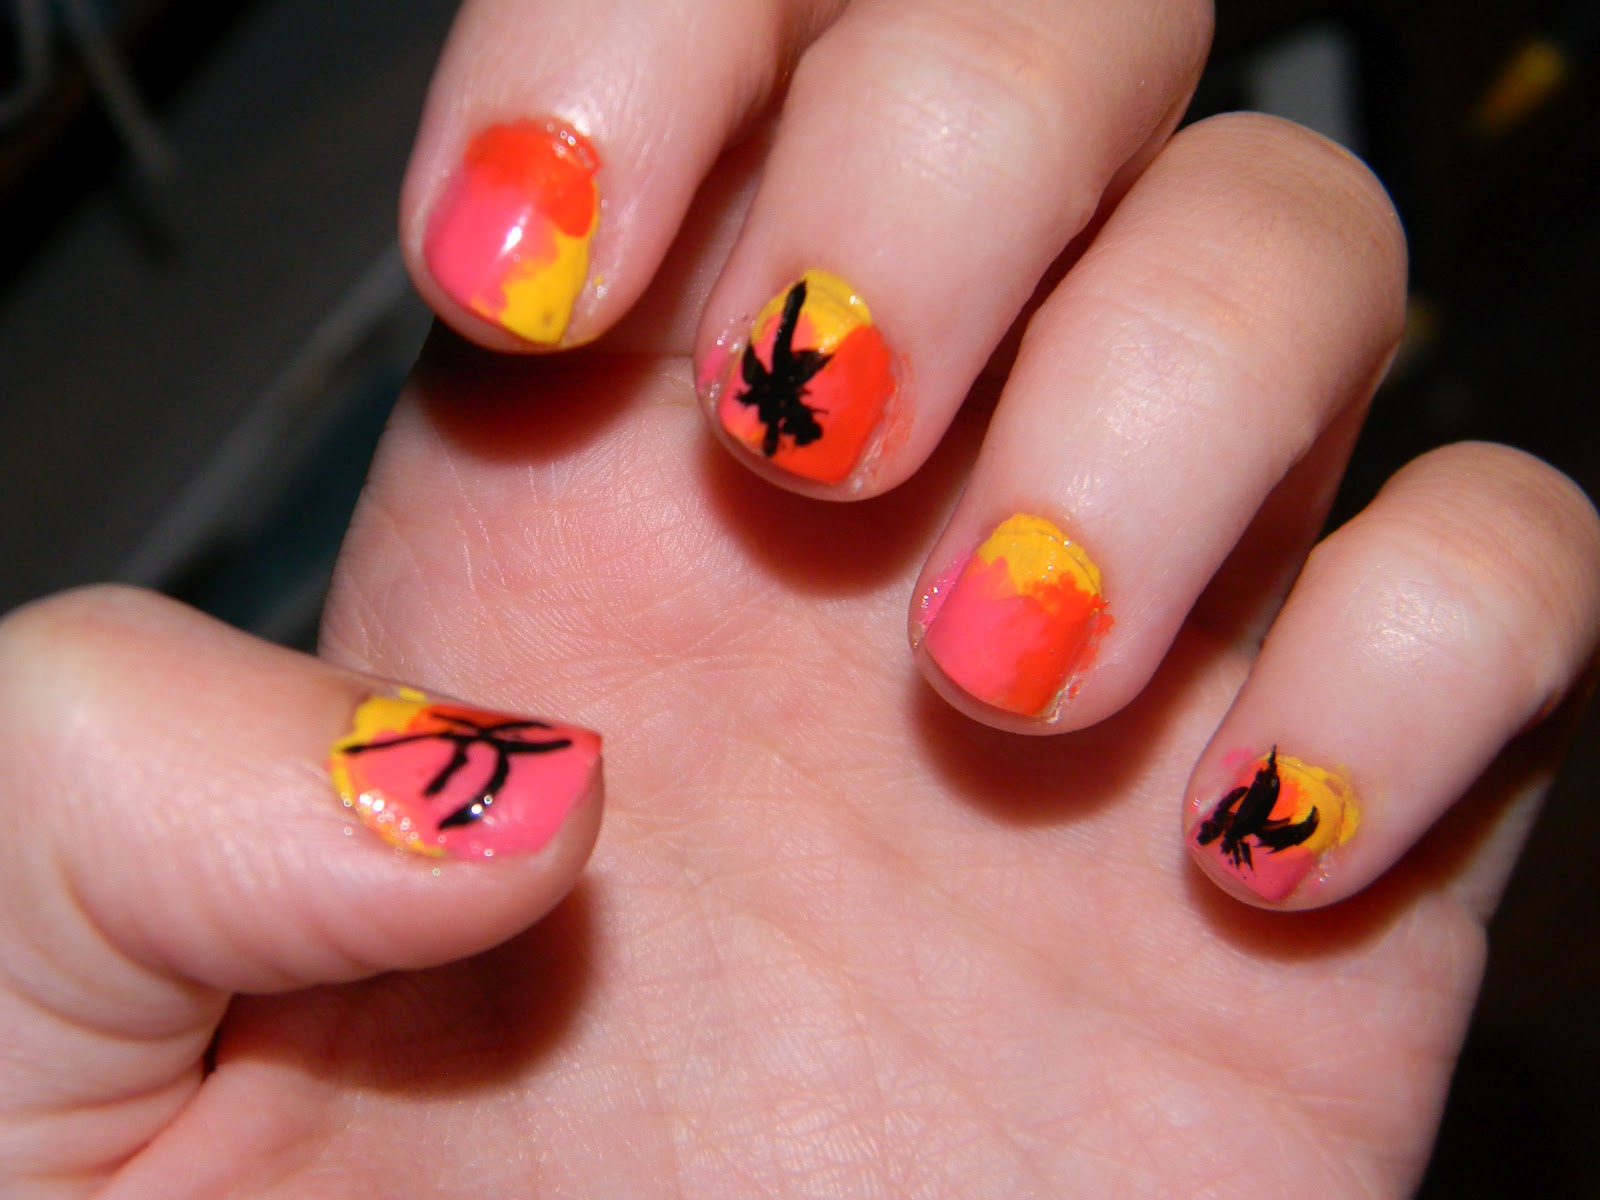
Step One: After you started your
basic manicure, apply yellow polish to 1/3 of your nail (the cuticle, the side, or the top). Mix up the way you apply it per nail, so no sunset is the same.
Step Two: Do the same with the orange. The colors should look like they're melting into each other.
Step Three: Do it one last time with the pink. I ran over them with a top coat while still mildly wet, to blend the colors even more.
Step Four: Make a palm tree with your black nail art polish. Start with the trunk (thick at the base), pulling it toward the center of your nail (thinning as you go). Make your "fronds" where you left off at the center.
Step Five: Repeat the palm-tree process with one or two of your other nails. I did my thumb, middle, and pinky fingers.
It's vacation at your fingertips! :)
xoxo,
Zoe


No comments:
Post a Comment