Showing posts with label how-to. Show all posts

June 26, 2012

How To: Make Sunset Cupcakes

  Hello!


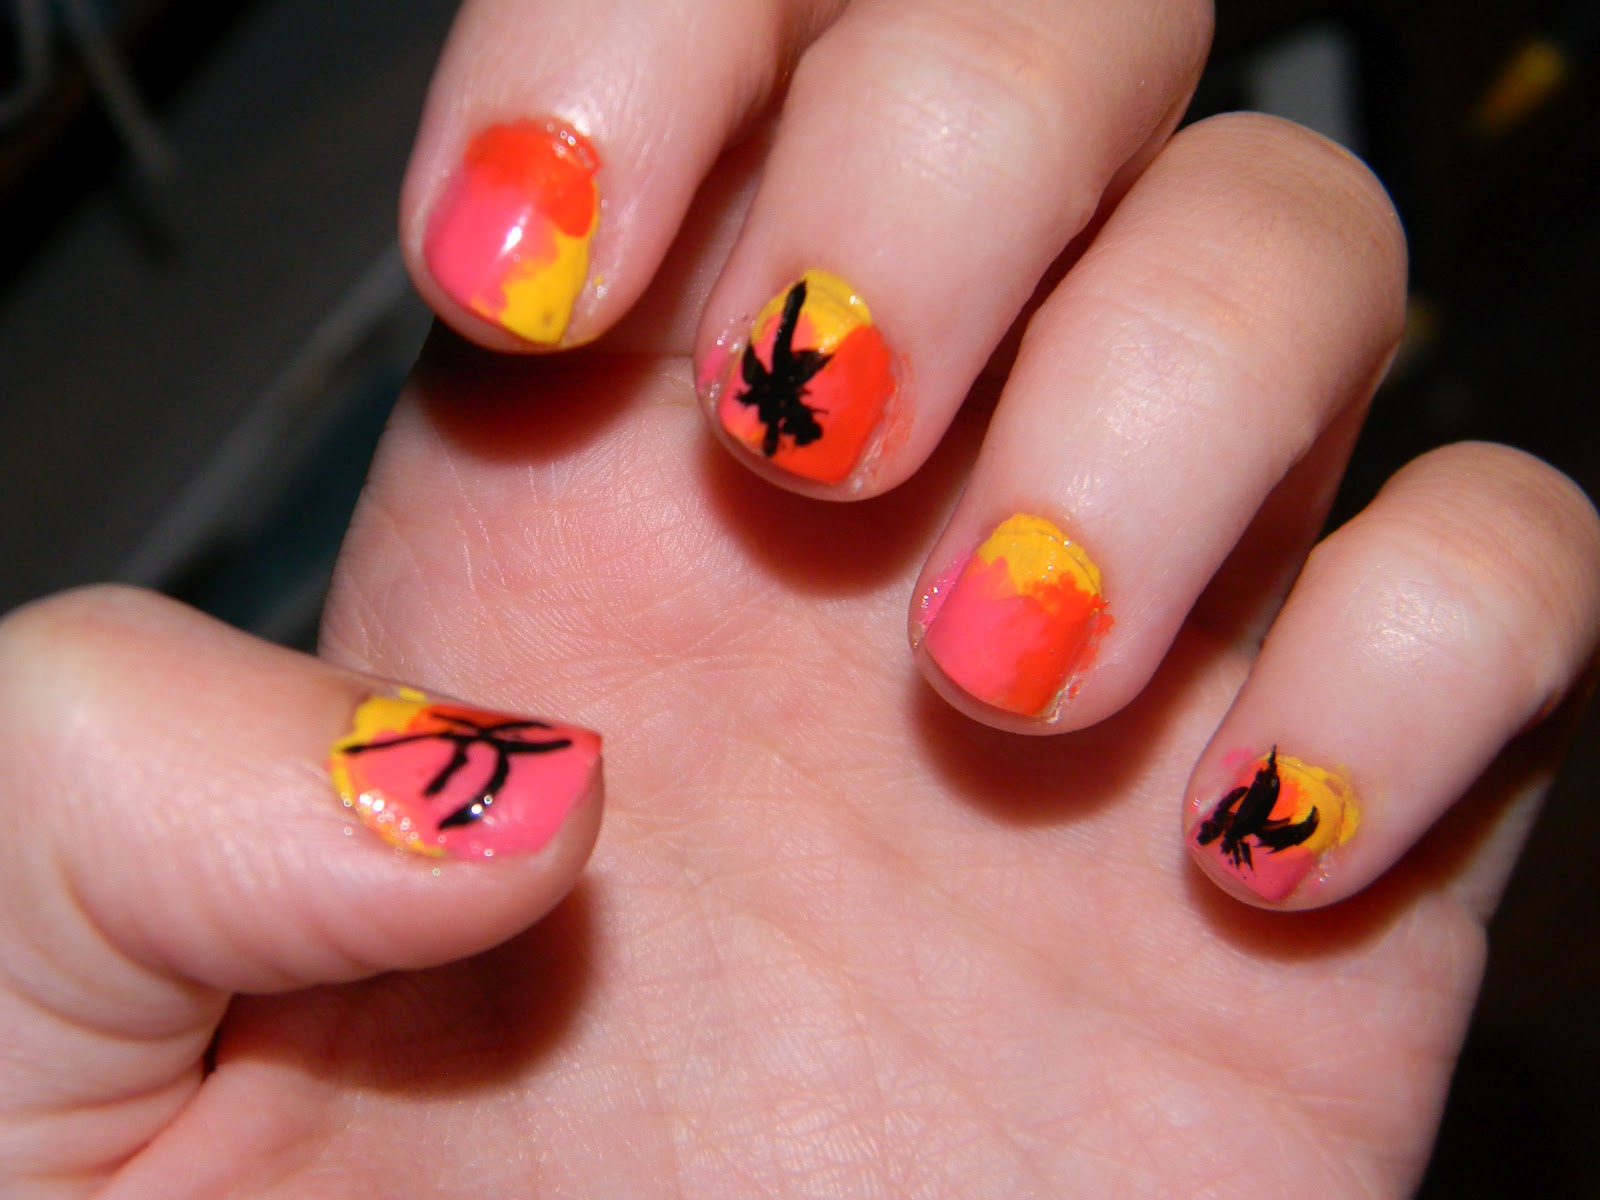
  Remember my sunset nails? Well, this cupcake tutorial is inspired by them! The recipe below is so delicious. It's not vanilla so much as just white cake flavored; it's reeeally sweet! It's originally from here, but I added the food color/frosting details.


  You'll Need...
  1/2 cup milk
1 cup white sugar
1/2 cup butter
2 eggs
2 teaspoons vanilla extract
1 1/2 cups all-purpose flour
1 3/4 teaspoons baking powder
Red food coloring
Yellow food coloring
Frosting
(I used cream cheese)

No AA batteries means I had to use my iPhone..
1) Preheat oven to 350 degrees (Fahrenheit). Line a muffin pan with paper liners (or grease a 9x9 pan if you want to make a cake instead).        
       
2) In a medium bowl, cream together the sugar and butter. Beat in the eggs, one at a time, then stir in the vanilla. Combine flour and baking powder, add to the creamed mixture and mix well. Finally stir in the milk until batter is smooth.


3) Divide batter into three separate bowls. Add yellow to one, red to another, and an even red/yellow combination to the last one (remember, a little goes a long way!). Stir until desired color is achieved. When spooning the batter into your cups, remember you still have two colors left... don't overdo one color!               


 4) Bake 20 to 25 minutes in the preheated oven, or 30-40 if you're making cake. Cupcakes are done when they spring back to the touch.                      
In the nail tutorial, I added palm trees. With the cupcakes... At least I can say I tried.

 5)  After they've cooled, frost them. I used standard Duncan Hines Cream Cheese frosting, but I'm sure there's a trillion sugary recipes fit for these little calorie bombs.


    Just so you know: The food coloring method can also be used for rainbow cupcakes! I tried this a while ago, but didn't blog the recipe (there was a cornstarch incident). The mini sunsets tasted much better, anyway. :)


    Enjoy!

 xoxo,
    Zoe

June 22, 2012

How To: Sunset Nails!

   Hello!

  I'm here today with a nail tutorial for super-easy sunset nails. I was inspired by one of my friends' manicure that she had done at a salon, but I took the main features of it and gave it an easier twist. Let's get this (beach!) party started.


You'll Need...
~ Yellow nail polish ~
~ Pink nail polish ~
~ Orange nail polish ~
~ Black nail art polish ~
~ Top coat ~
~ Base coat ~

Step One: After you started your basic manicure, apply yellow polish to 1/3 of your nail (the cuticle, the side, or the top). Mix up the way you apply it per nail, so no sunset is the same.

Step Two: Do the same with the orange. The colors should look like they're melting into each other.

Step Three: Do it one last time with the pink. I ran over them with a top coat while still mildly wet, to blend the colors even more.

Step Four: Make a palm tree with your black nail art polish. Start with the trunk (thick at the base), pulling it toward the center of your nail (thinning as you go). Make your "fronds" where you left off at the center.


Step Five: Repeat the palm-tree process with one or two of your other nails. I did my thumb, middle, and pinky fingers.

  It's vacation at your fingertips! :)
 xoxo,
    Zoe

January 15, 2012

How To: Make a Pill Popper's Pencil Pouch

   Hello, hello!


    I don't know about you, but I'm totally fascinated by pills. How their tiny little bodies hold enough stuff to fix, if only temporarily, your whole body-- it just blows my mind!
     Pills are the inspiration behind this how-to. Read on to learn how to make a pill-lookalike pencil pouch!

  You'll need...
  • Red Duct Tape
  • White Duct Tape
  • Scissors
  • Paper
  • Pencil
Let's get started!


Step One: Once you have your materials gathered, use your pencil to trace a half-oval. Once you cut it out, use it as a template to trace and cut out three more.


Step Two: Prepare your duct tape pieces. Carefully wrap your paper half-ovals-- two white, two red.


Step Three: Make sure all the half-ovals are the same shape. (Hold them up to each other, two at a time, and cut out the excessive tape.)


Step Four: Now that they're all perfectly aligned, tape white/red and white/red together carefully. (It's important to keep it neat!) Reinforce the flimsy backs by overlapping spare tape (of any color).


Step Five: Being as precise as possible, tape the sides together. Don't forget to tape the bottom, or whatever you're carrying will slide right through! Once the bottom is secure (as shown above), you can tape the top about a quarter to halfway up.


Viola! Your pouch is complete!

Here's a tip: When you're wrapping the duct tape --whether it's around the half-ovals or taping the sides together-- neater is better. Don't rip off the tape you're using, try to cut it. Also, try to align the pieces properly, for a sleeker-looking pouch. :)


        Have you made anything recently?

xoxo,
Zoe

September 25, 2011

How To: Make Rice Crispy Treats

---Originally posted on 7/2/11 to Teenage Times--- 
  Hey hey.
    
   So I haven’t done a how-to in a while, right? I figured this time it should be a recipe. It’s simple, fast, and classic.
    Rice Crispy treats are made with a bunch of extra gunk, right? So why not make your own? This is a really simple post on how to do so.
                       
                            How to Make Rice Crispy Treats —in 3 Steps


      You’ll need…
                        –  4 cups of miniature marshmallows  … or 40 regularly sized
                        — 6 cups of crispy rice cereal    …     I used generic, it tastes the same
                        — 3 tbsp of butter or margarine           
                        — Chocolate syrup                      …               optional


                                                     Directions
                                                    (for a stove)  
   

     1) In a large saucepan,  melt butter over low heat. Add marshmallows and stir until completely melted. Remove from heat.


   2) Add your crispy rice cereal to the saucepan. Stir until the cereal is evenly mixed.
                                        

     3) A 9×9 pan is suggested, but if something goes awry and you don’t have enough, use a smaller pan. Spread the mixture into the pan, and let it cool.
                                

   Optional 4) Squirt chocolate syrup.
                      
                    I tried to do the syrup argyle-style. It didn’t work.

       Enjoy!

     xoxo,
         Zoe

September 23, 2011

How To: Write a Fan Letter

   ---Originally posted on 3/15/11 to Teenage Times---
 Why, hello there.

  If you’re like me, you love mail. You effing love it. You sign up for free samples just to get something for yourself in the mail. You send away letters for the same reason. Love letters, hate letters, fan letters…Let’s focus on that last one. I was recently on one of my favorite authors’, Garth Nix’s, website, and decided to write him a fan letter. I decided that, since it was a somewhat unusual process for me, I’ll do a blog post detailing how to write a fan letter. Properly.

   Step One: Gear Up.
    You’ll need noticeable stationery. And, optionally, a pen with pretty ink. Don’t get colorful envelopes, though, because the mechanical address-readers have problems reading them(take red, for example).
                
                             Stationary: Target
       
     Step Two: Dear…               Decide who you’re writing to. Is it a musician, actress, author…?
    
    Step Three: Draft it.
      Type up a prototype. Once you think it’s perfect, rewrite it entirely, without looking back at it. This drains unnecessary thoughts and ideas. Absolutely don’t forget: Spell-check!
      
   Step four: Write it out.
                Carefully and neatly write your letter. Don’t cram the given writing space–your favorable person probably won’t squint to read before throwing it away. I closed mine with “Yours appreciatively”.
                                 
                                    Dig my horribly horrible handwriting?
            
            Step Five: Address it.
               Come on.   You know the drill.
        
            Step Six: Hey, Mr. Mailman…
                    Mail it! If you want a reply, be sure to include a SASE (self-addressed stamped envelope). If your person is from another country, include a SASE and an  International Reply Coupon(can be redeemed for minimum postage for the person it’s being sent to–in this case, you!). Including these things is probably the most important step on here, really and truly.
       
 All righty then. I hope this helped with your quest for reply letters! That’s all, folks.
       
             xoxo,
             Zoe

September 19, 2011

Waka Flocka Crane: Make Some Cranes for Your Ceiling

              ---Originally posted on 3/15/11 to Teenage Times--- 
     Hey there.
  I know I’ve never done a how-to, but there’s a first time for everything! This showcases an origami flock on your ceiling. It’s time-consuming, but looks kind of cool.

     WakaFlockaCranes
  You’ll need:
  • Origami Paper
  • Hole-Puncher
  • Scissors
  • String
  • Duct tape (color of your ceiling) (or Clear Tape:)
  • Lots of time
 Alrighty, let’s get started.
   First, you’ll need to learn how to make an origami crane. This video is super boring and kind of lame, but it’s what taught me. Click here for the video.
 Now that that’s out of the way, let’s start. You’re going to want to make several, so your crane isn’t a pathetic, lonely little guy. He could become suicidal. Do you really want that?
   After you make a few, grab a chair and some string, and see how long you want your birds to hang. Afterwards, cut the rest of the string to sizes around that size.
 
   It's a crane...with string!

  Next, snatch a hole-puncher and punch those cranes. One at a time, you’re going to pull back the birds’ wings and punch in the little body part. Then, string it up. Try to make the knot as short as possible, so your birds can hang at the desired spot.
 Punch it.

   After this, hang them up. I, with my lack of long legs, had to jump from my chair and smack it on the ceiling. Jump (…or not) after you stick some duct tape to the top of your string.
 Congratulations! You're finished. ;)

  Congratulations! You’ve finished. It’s worth it, know why? Because: do your friends have a random flock of cranes on their ceilings? No. So you win.
  Alrighty. Enjoy your birds.

   xoxo,
   Zoe